
Microsoft Active Directory is used in organizations to allow administrators to centrally manage access to network resources as well as permissions for users and groups. The purpose of this home lab is to emulate the setup of a corporate network with several users.
In this project I installed Oracle VirtualBox (VM) and downloaded Windows 10 ISO and Server 2019 ISO to install two operating systems on two separate VMs. The first VM is the domain controller that has Server 2019 installed and will house Active Directory. It has two network cards that will connect the external internet to the VirtualBox private network. I then ran a PowerShell script to create 1,000 users in Active Directory. The second VM has Windows 10 installed on it and connects to the VirtualBox private network.
Step-by-step walk through of the setup process:
The first step is to download VirtualBox and the extension pack from http://www.virtualbox.org/. After that, Windows 10 ISO and Server 2019 ISO must be downloaded as well.
From there the first VM can be created by opening up VirtualBox. This one will be the domain controller so I gave it 2GB of RAM, 4 CPUs, and 20 GB of disk storage. The last setting to adjust is under “Network”, where I made sure the first NIC was enabled with NAT (Network Address Translation) as this adapter will connect to the outside internet and then I enabled a second NIC to connect to the internal network.
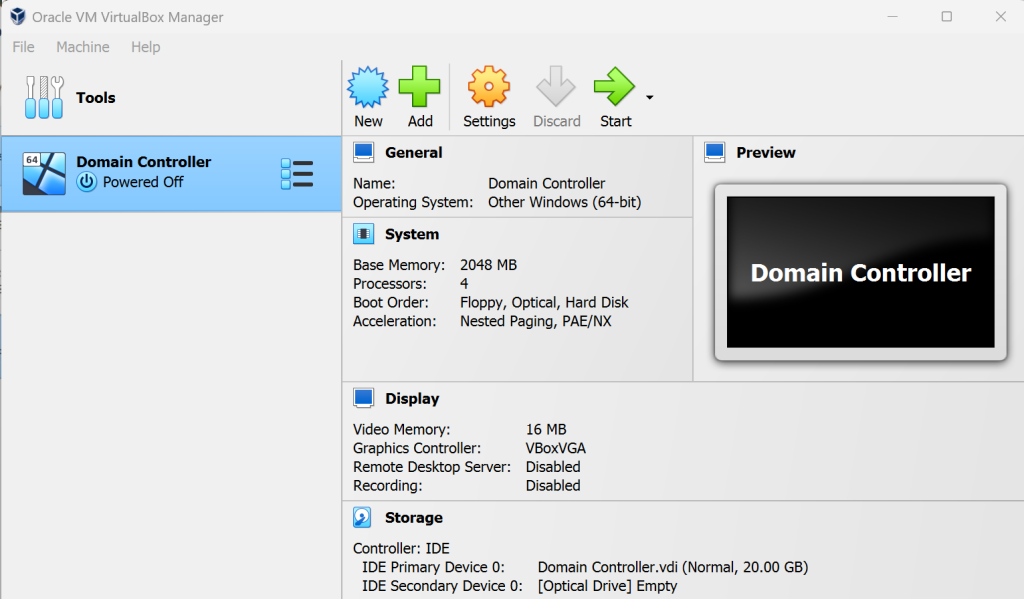
The next step will be to open the VM that was just created and install Server 2019 on it. It will take a few minutes to load and then will ask to create administrator credentials. Once logged in, I installed VirtualBox Guest Additions so that everything could run a bit smoother. I also renamed the VM so I can identify it as the domain controller.
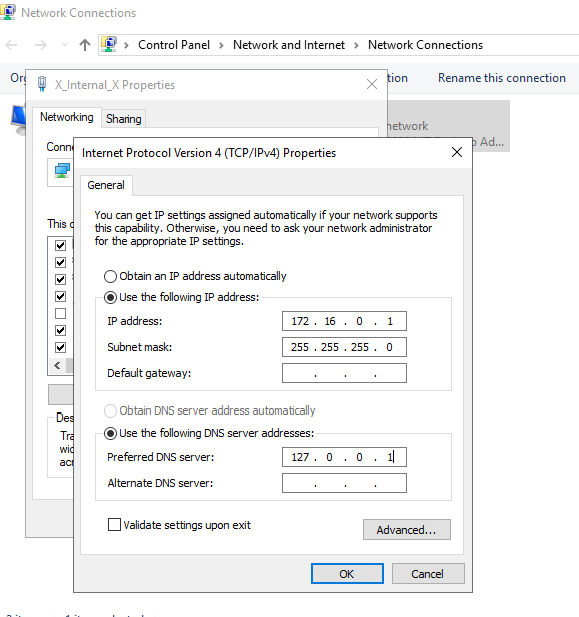
From here I checked the network cards in the network settings of the VM to see which one was for the external internet and which one was for the internal network. For the internal network card, I opened up the IPv4 settings to assign it the internal IP address along with its subnet mask. I left the default gateway blank as the domain controller will serve as the default gateway since it has both an internal and external NIC. For the DNS server I used its loopback address since Active Directory will have its own DNS server.
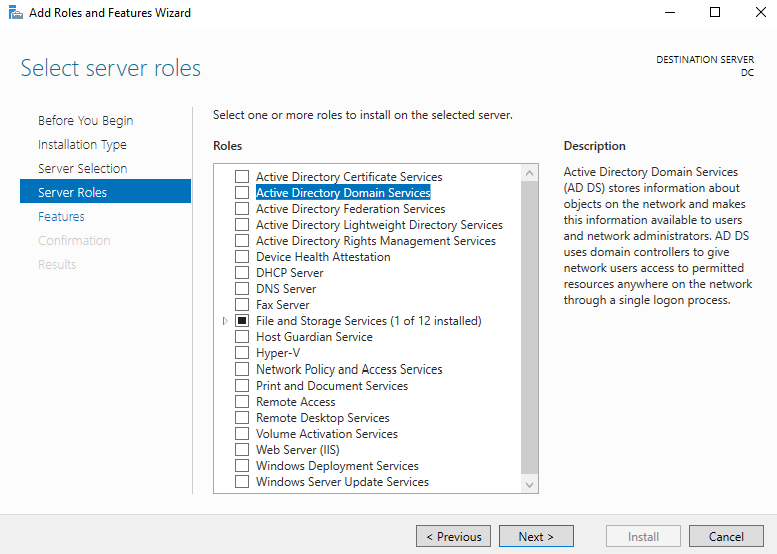
The next step will be to click on “Add roles and features” in the VM’s server manager dashboard. Here I selected the domain controller server that was created earlier and then selected “Active Directory Domain Services”. Then I went to the end and installed it.
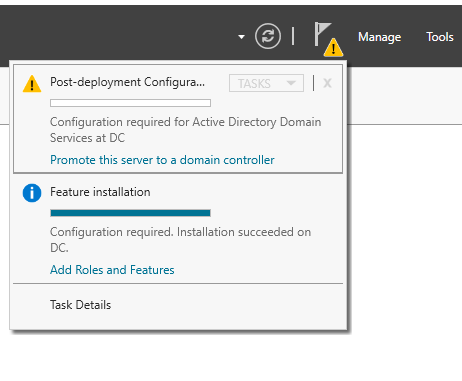
Once it is installed, there will be an alert on the top right corner for the post-deployment configuration. I clicked on “Promote this server to a domain controller” to actually create the domain.
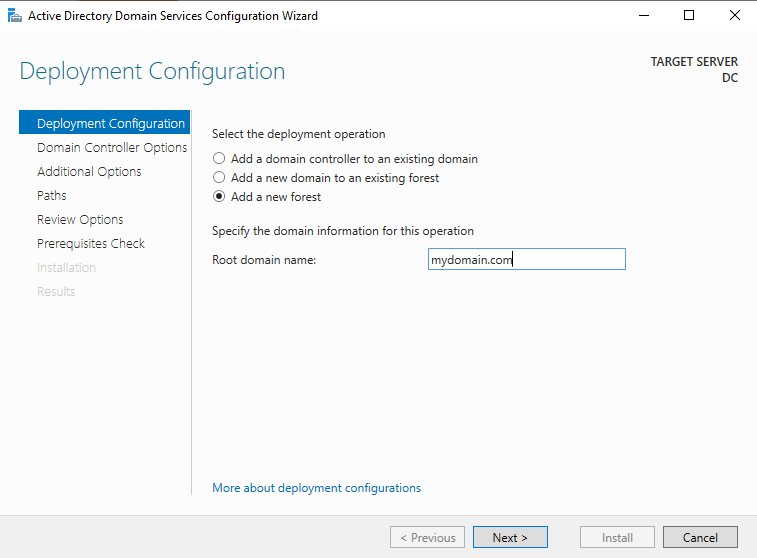
Under those settings I selected “Add a new forest” and typed in a generic domain name and clicked next. Then in Domain Controller Options it asks to create a new password. I went all the way to the end and clicked install and waited for the VM to restart.
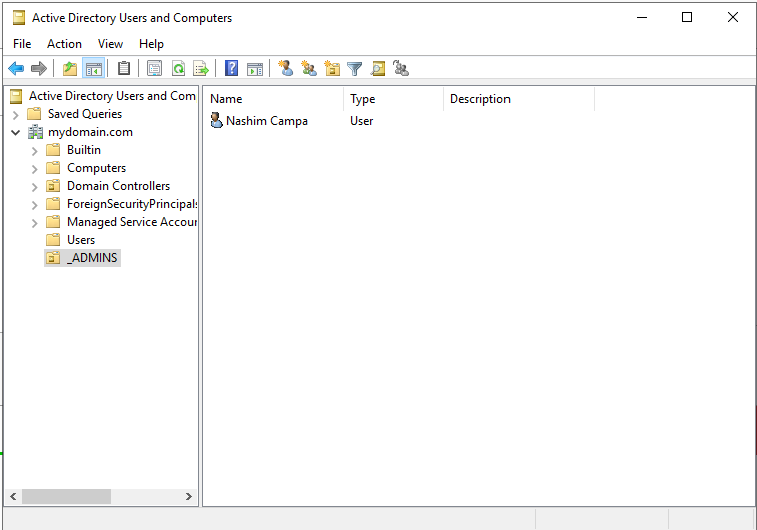
Once back into the VM, a dedicated administrator account will need to be created. This can be done by going to Start -> Windows Administrative Tools -> Active Directory Users and Computers. In the domain name that was created, I created a new organizational unit folder. I clicked on the folder and selected “New” and then “User” so that I can create the admin account and should look like this:
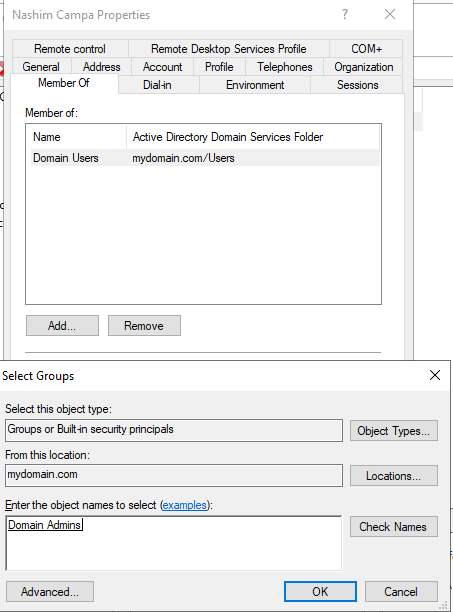
Now it is not registered as an admin account quite yet, so I opened up the properties, selected “Member Of”, and typed in “Domain Admins” in the box. Then I clicked “Ok” and “Apply”. Now that the account is an admin account, I logged out of the current account and logged back into the new account.
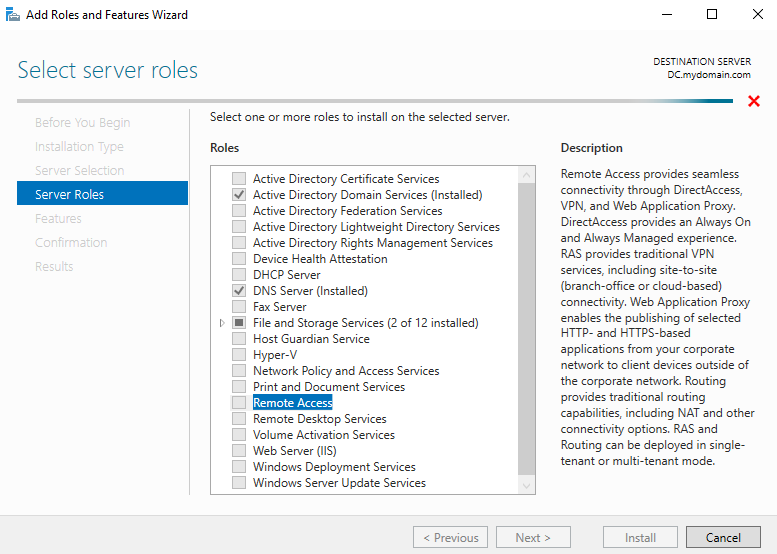
The next step will be to configure some additional settings on the domain controller so that the Windows 10 VM (which will be created shortly) can be routed from its private network through the domain controller to the outside internet. To do this, I went back to the server manager dashboard and clicked on “Add roles and features”. On the server roles options I selected “Remote Access”.
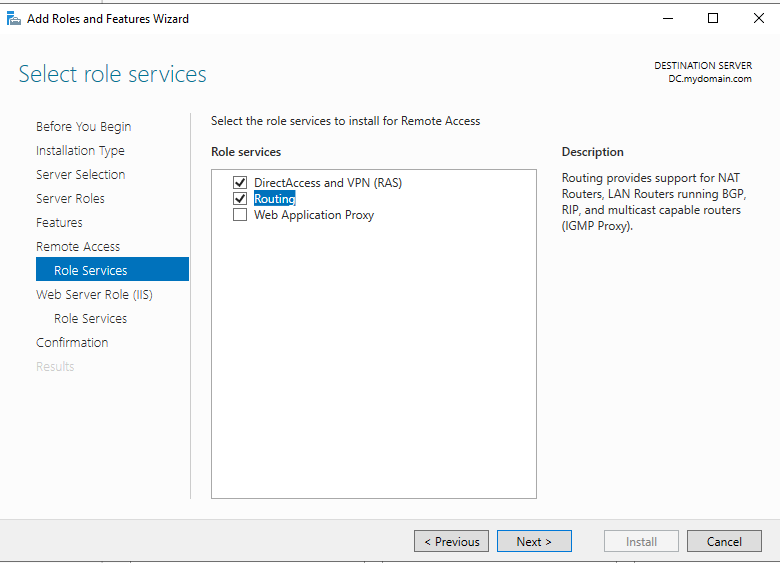
From there I skipped to “Role Services” and selected Routing, then clicked on “Add features” on the pop-up window.
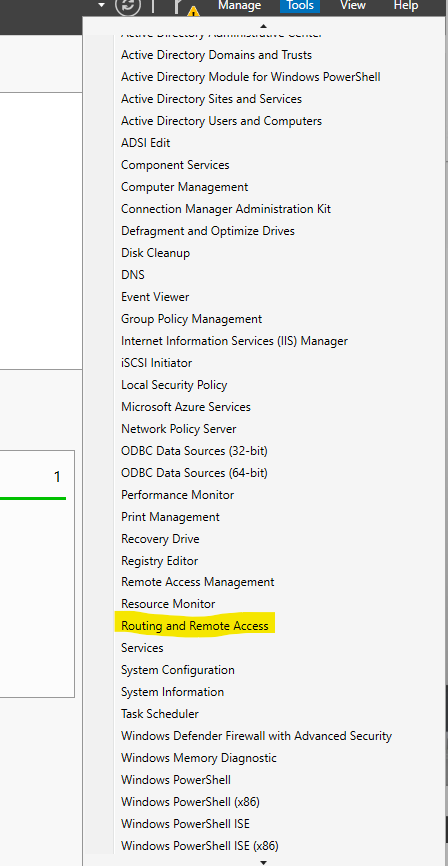
Once that installed, I clicked on “Tools” on the top right and selected “Routing and Remote Access” from the dropdown menu.
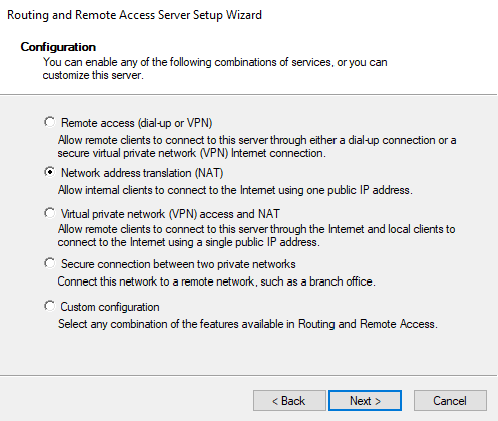
That’ll open up some configuration settings and I selected NAT (Network Address Translation).
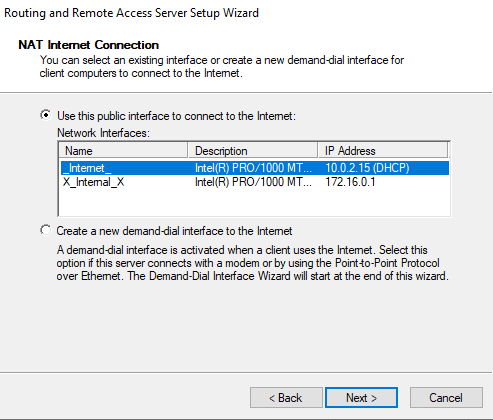
After clicking Next, I selected the NIC that connects to the outside internet and then went to the last page and hit Finish.
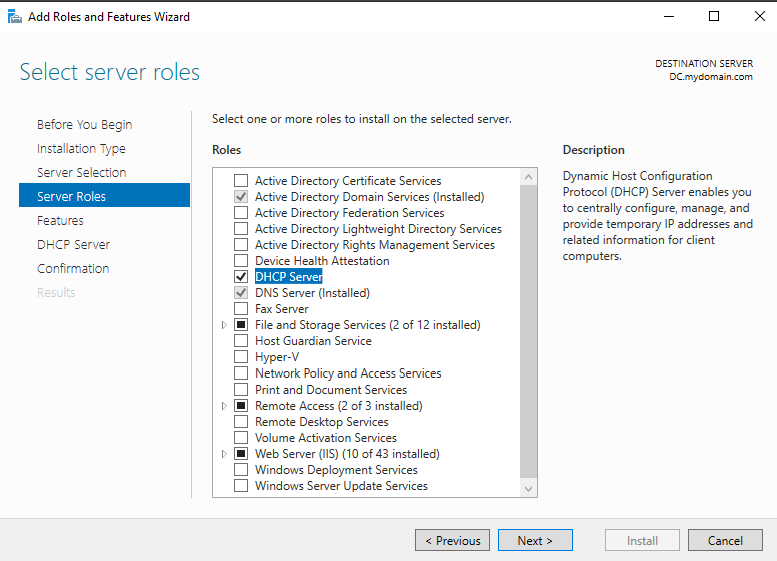
The next step will be to set up a DHCP server on the domain controller. This will allow the Windows 10 VM to obtain an IP address so that it can access the external internet. To do this I went back once again to the server manager dashboard and clicked on “Add roles and features”. Then I added the DHCP server from the options.
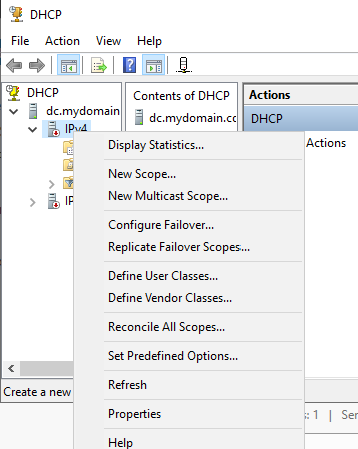
Once that installed, I went to Tools and clicked on DHCP to open up the settings. It shows both DHCP servers down so I right clicked on the IPv4 one and clicked on “New Scope”.
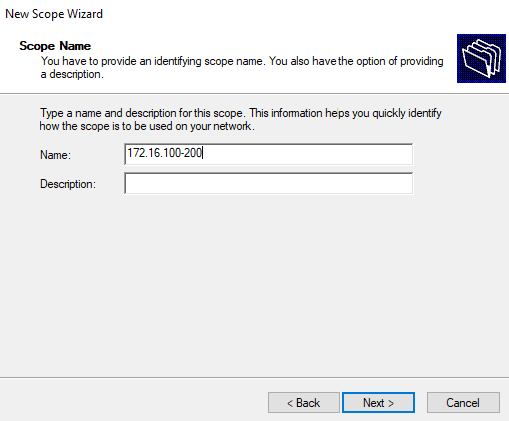
For the scope name here I used the IP address range that I’ll be using.
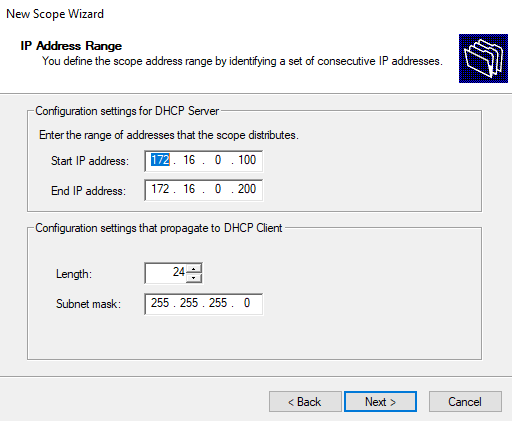
For the DHCP configuration settings I entered the starting and ending IP addresses and changed the length to /24 which is the corresponding CIDR notation for the subnet mask I am using. On the next page it asked for the duration of the lease time, but for the sake of this exercise I just left it at 8 days.
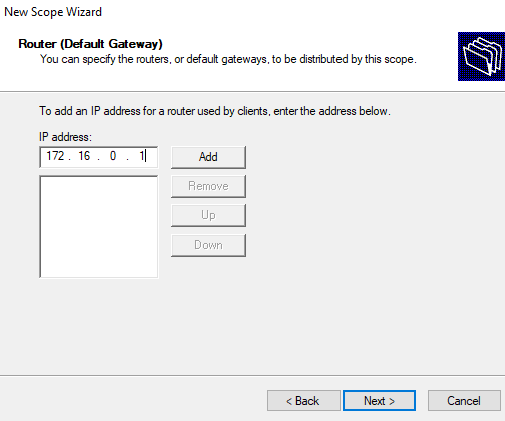
For the default gateway’s IP address I typed in the domain controller’s IP address and added it.
Once I got to the end and clicked Finish, I right clicked on the DHCP server to authorize it and then refreshed the one that was just configured and it is now up and running.
From here I’ll go through the process of creating 1,000 users by running a custom PowerShell script using 1,000 randomly generated names. The script will grab the random name and create a new organizational unit and assign it a username and password that will be stored in Active Directory. It then runs a loop to continuously extract each name to create an individual account one by one.
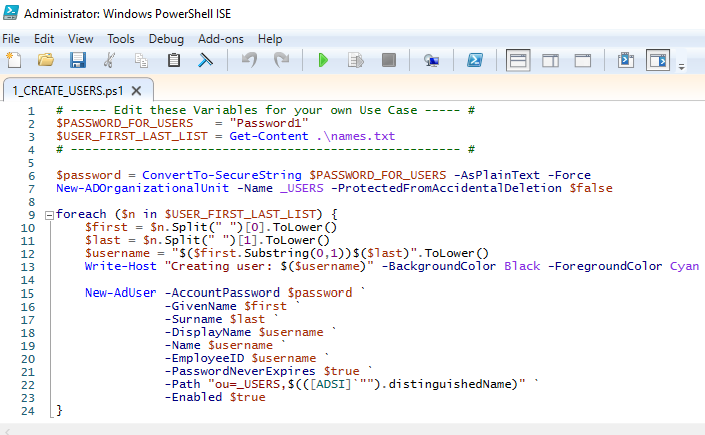
Now before running the script, I typed in the “cd” command in the interface so that the script can grab the random names from the notepad file it is stored in.

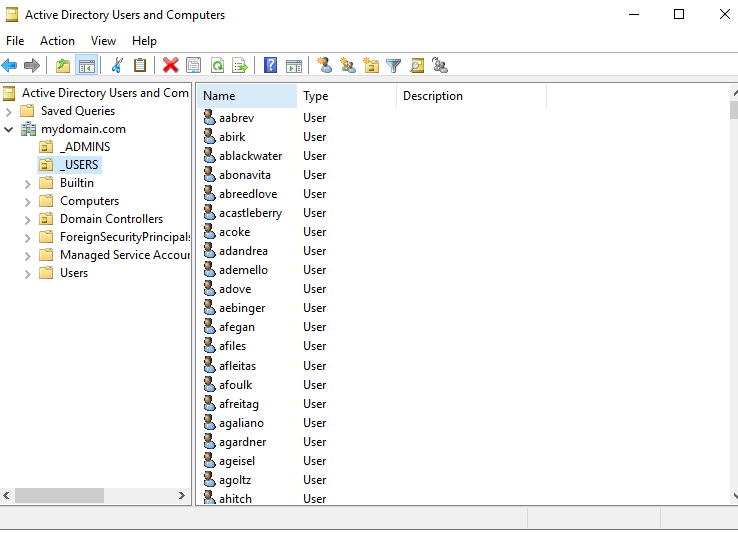
Once the script is run, the users should now begin to populate in Active Directory.
The final step will be to create the Windows 10 VM in VirtualBox. For this VM I gave it 4GB of RAM, 4CPUs, and 50GB of disk space. Under the network settings I changed the adapter settings from NAT to internal since this VM will be on the private network. After that I powered up the VM and installed Windows 10 ISO on it.
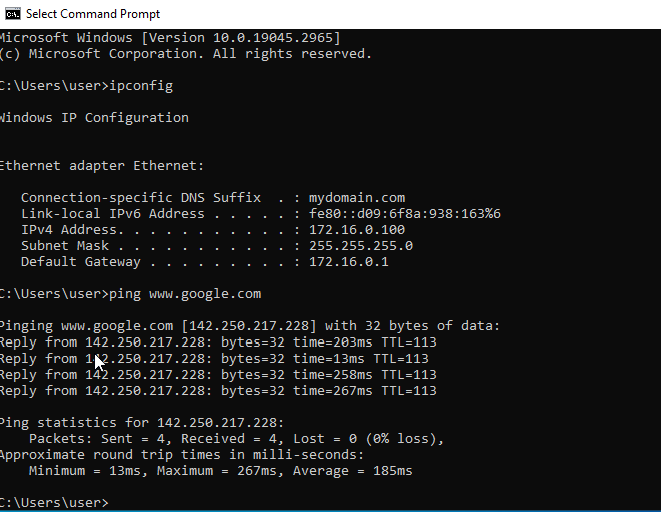
Once the VM is installed, I ran the ipconfig command in the command prompt to make sure all of the configurations are set up correctly. After that I pinged Google.com to make sure the internet was accessible and that the DNS server is working. This confirms that the planned architecture is set up successfully.
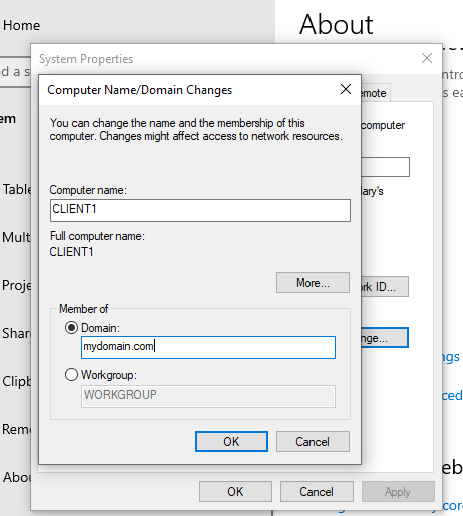
After that I went to the Windows settings and clicked on “Rename PC (Advanced)” so that I can change the name of the client and add it to the domain at the same time.
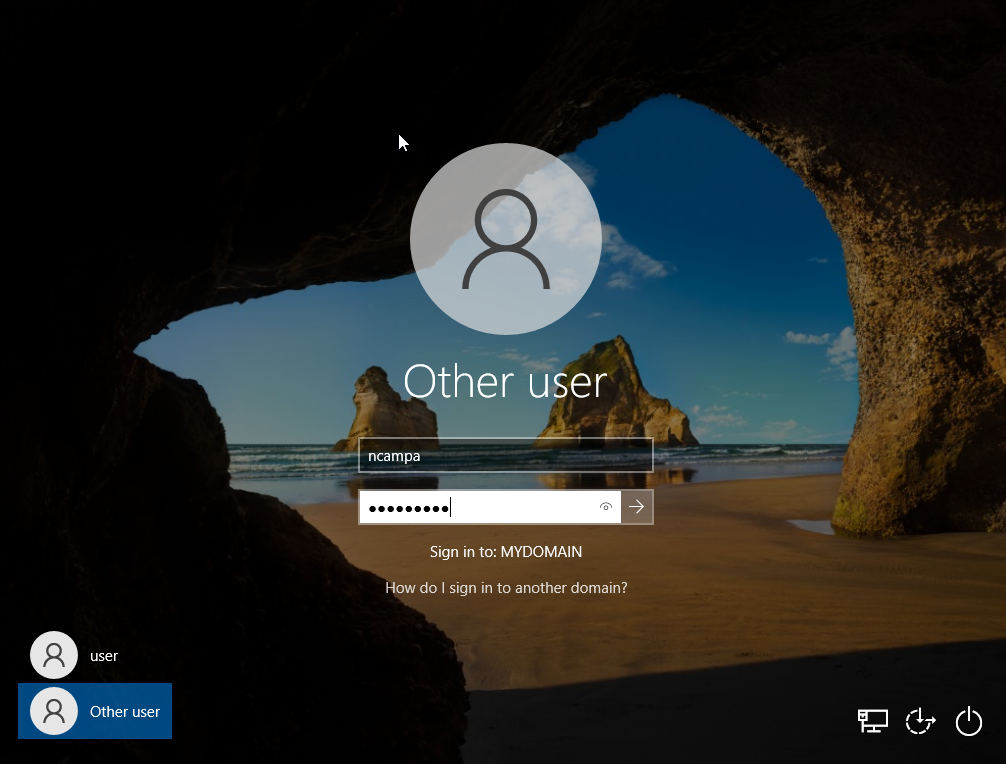
Once that is done it’ll force a restart. Now any user account that was created using the PowerShell script should be able to log in to the network with their credentials. Below is an example of a user account I created for myself (not an admin account) as a test and it was able to log in to the Windows 10 client.
The network is now fully up and running and the users and resources can be managed within Active Directory.