
Vulnerability management is the process of performing scans on software in a network to discover any potential security vulnerabilities so that they can be remediated. Organizations run this process continuously so that any discoveries can be quickly resolved before attackers exploit them.
The intention of this project is to simulate vulnerability scanning in a corporate network environment. To do this, I downloaded VMware Workstation Player to run a VM with Windows 10 installed on it. I also downloaded Nessus Essentials which I used to run credentialed scans to discover vulnerabilities on the local VM and remediated some of them. Here is the step-by-step process:
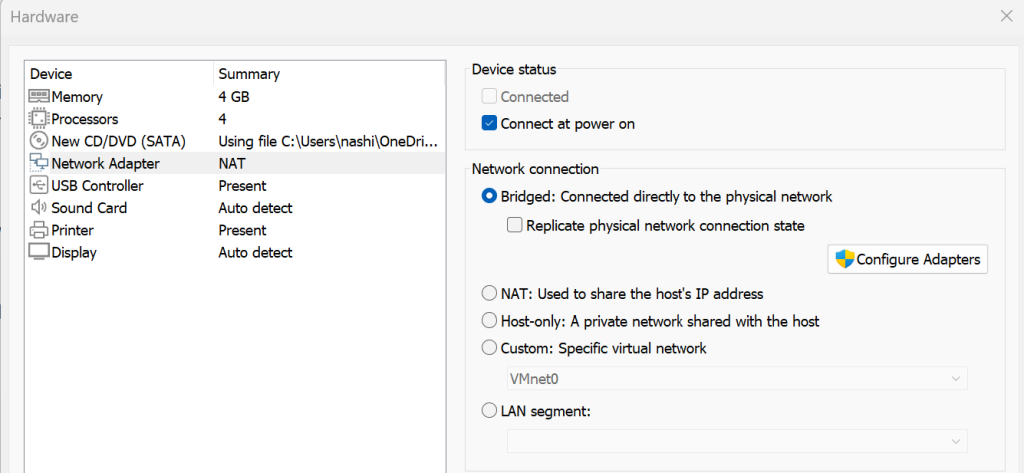
Once VMware and Windows 10 finished downloading, I created a new VM on VMware and set it up with Windows 10. I gave it 4GB of RAM, 4 CPUs, 50GB of disk space, and adjusted the network adapter settings to make sure it is on “NAT”. If I were on an ethernet connection I would’ve chosen “Bridge”, but since I am on a wireless connection I chose NAT so that it can function properly.
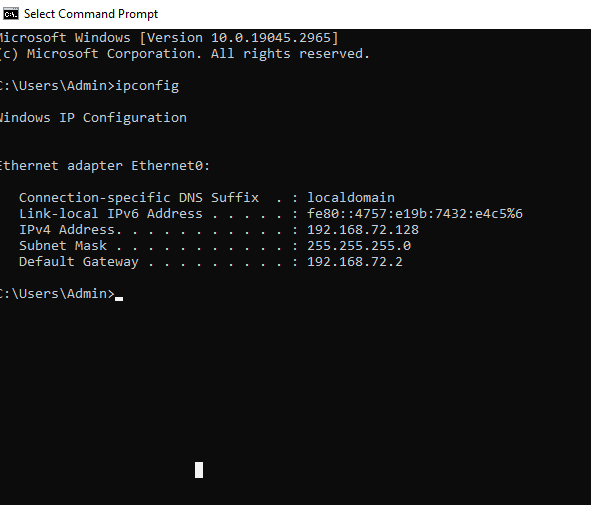
Once the VM was up and running, I ran the ipconfig command to get the IP address.
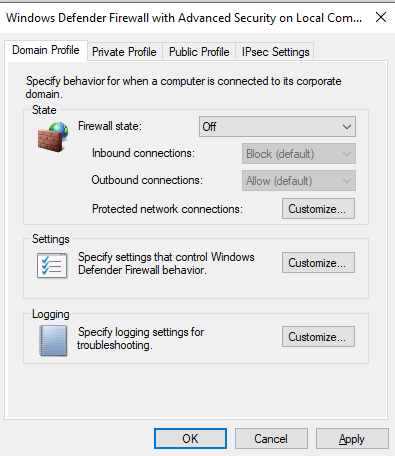
After that I tried pinging the VM from my physical computer but it couldn’t reach it, so I turned the VM’s firewall state to “Off” so that it can be successfully pinged. This is not a safe practice in a production environment but I am just doing it in this case for the sake of the lab.
Once the firewall state was turned off, I pinged the VM again using its IP address and was now successfully able to reach it.

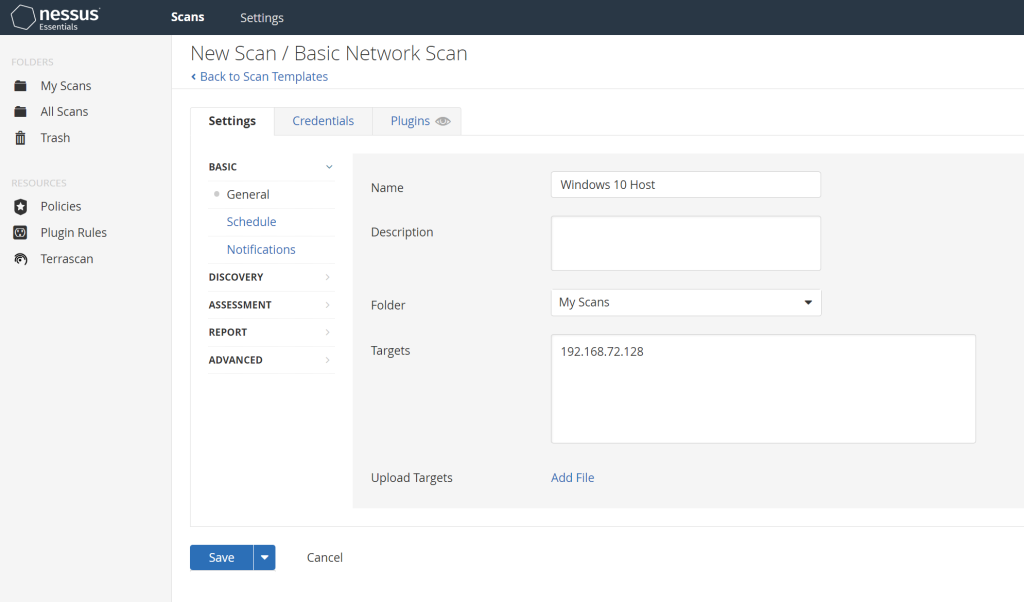
From there I went into Nessus and created a new basic network scan. I gave it a name and typed in the VM’s IP address in the “Targets” field. This will give the option to run a non-credentialed scan in which certain vulnerabilities will be discovered but the scan will not be as deep as a credentialed scan. I ran this one first to get some results and then will compare them with those of a credentialed scan.
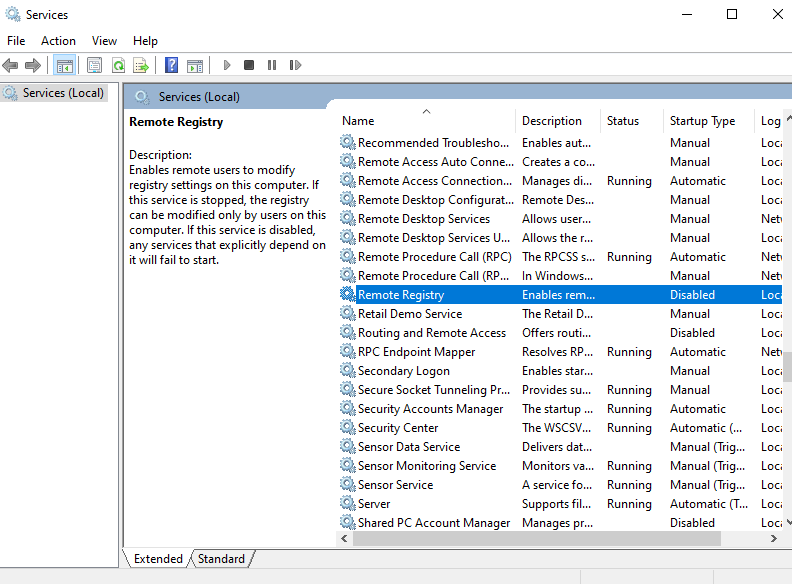
I went back into the VM to change some settings in order to be able to run the credentialed scan. I opened up the Services app in the VM and opened up the “Remote Registry” settings to enable it. This will allow the scanner to run through the VM’s registry and collect data. Now normally in a corporate environment this would not be part of the process but according to Nessus, this is the process that must be followed for this instance. I followed their instructions for enabling remote audits here: https://docs.tenable.com/nessus/Content/EnableWindowsLoginsForLocalAndRemoteAudits.htm#Configure-a-Local-Account.
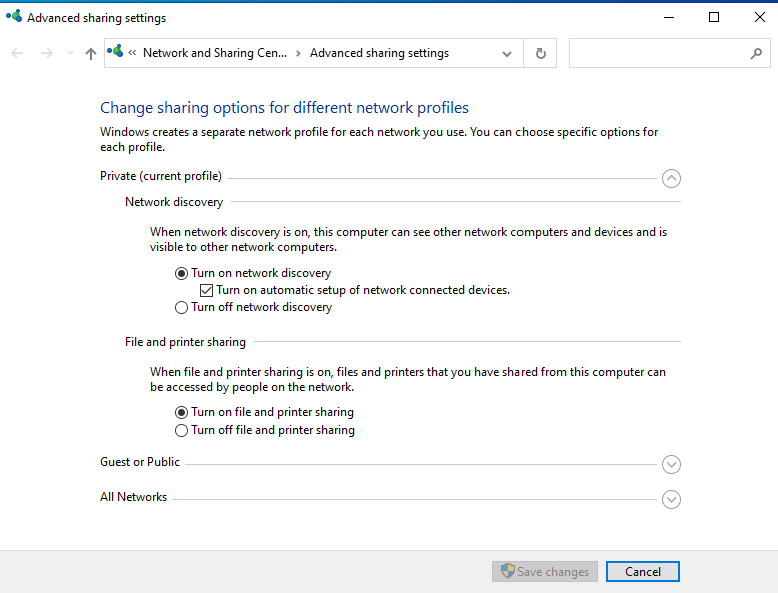
After that I made sure file and printer sharing were turned on as well.
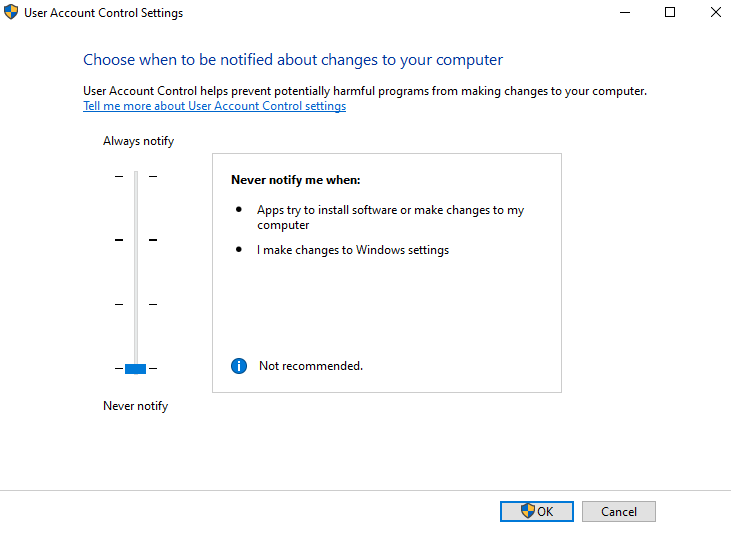
The next step is to go to User Account Control settings and change the setting to “Never notify” as this will also be a step needed to allow the scan. Again this is another task that one would normally not do but is being done for the sake of the exercise.
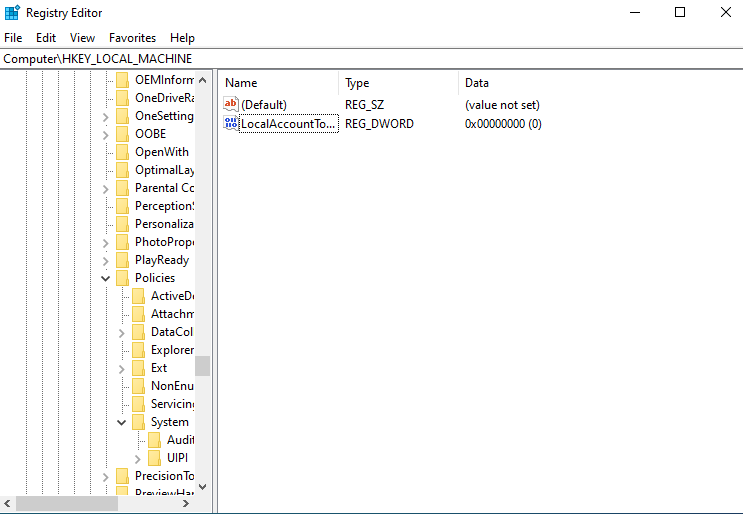
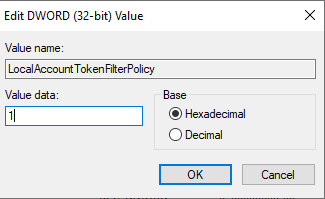
After that I followed another step recommended by Nessus which was to go to the Registry Editor and add a new DWORD named “LocalAccountTokenFilterPolicy” in one of the system folders on the VM.
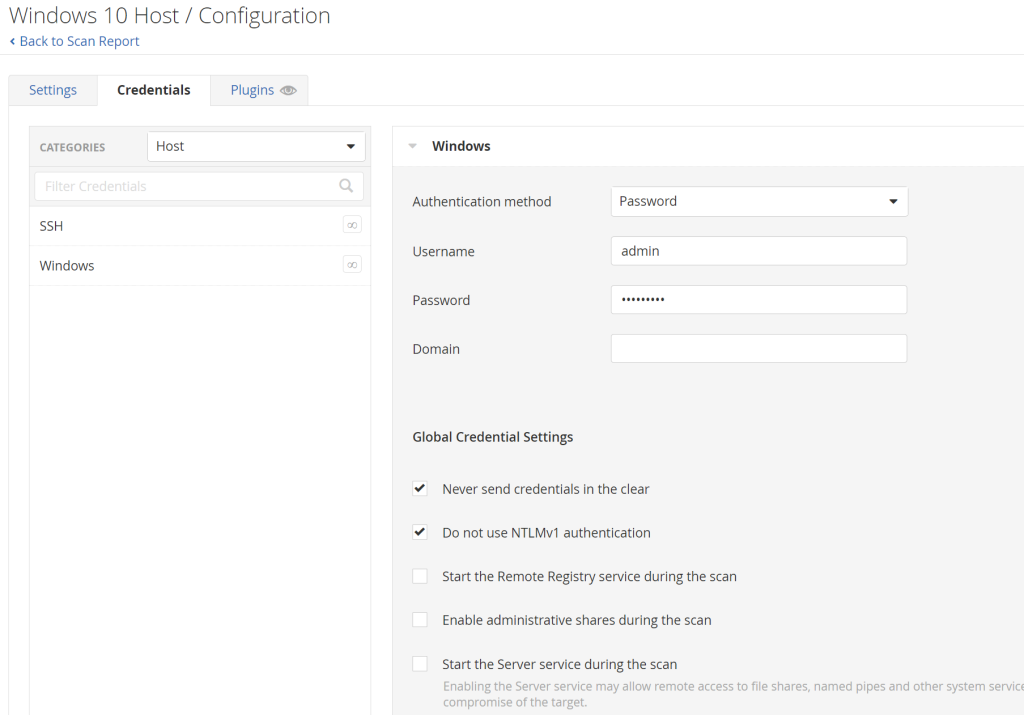
From there I went back to Nessus and opened up the configuration settings on the saved scan that was created earlier. I went to the Credentials tab and selected Windows. I typed in the username and password that I used for the VM.
I then tried running the credentialed scan but the results were the same as the non-credentialed scan so I knew there were some issues I had to troubleshoot. The first thing I noticed was that the VM never had a password created so I went ahead and created one (which is the one I had typed in the Nessus password field above to make sure they matched). Then I went through Nessus’ instructions again and realized I missed a step when enabling credentialed scans on the VM. When adding the DWORD key folder, I forgot to change the Value Data field to 1, so I went back and fixed that.
After that I restarted the VM and I took an extra step to make the scan results populate more vulnerability data since this is a newly created VM. I downloaded a really old version of Mozilla Firefox onto the VM and installed it. I then went back to Nessus and re-ran the credentialed scan.
These were the results of the initial non-credentialed scan:
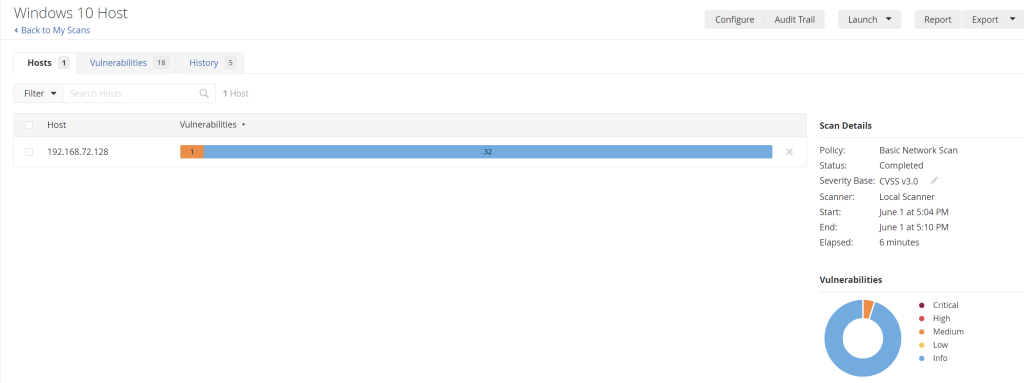
The majority of the results were informational and the highest one was classified as medium. Below are the results from the credentialed scan with an outdated Firefox version running on it:
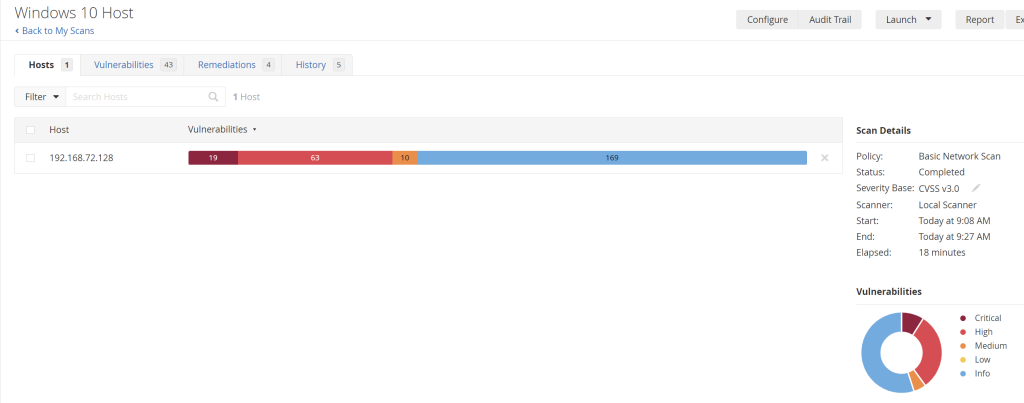
This scan discovered a vastly different set of vulnerabilities, including “Critical and High” categories which were not found in the non-credentialed scan. Here are the recommended remediations for it:
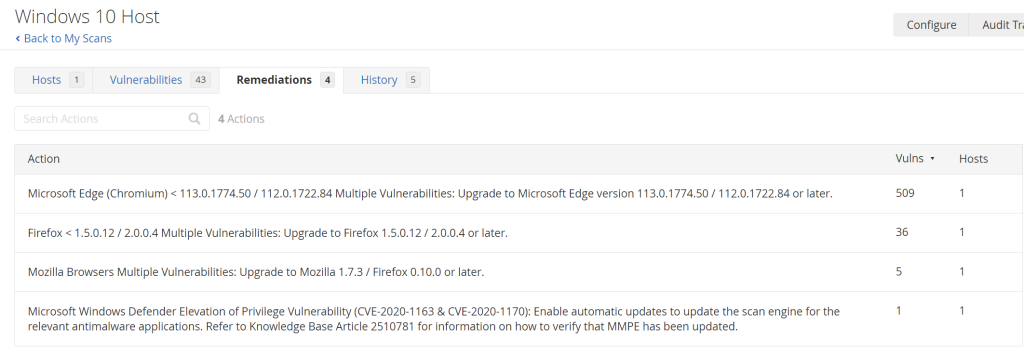
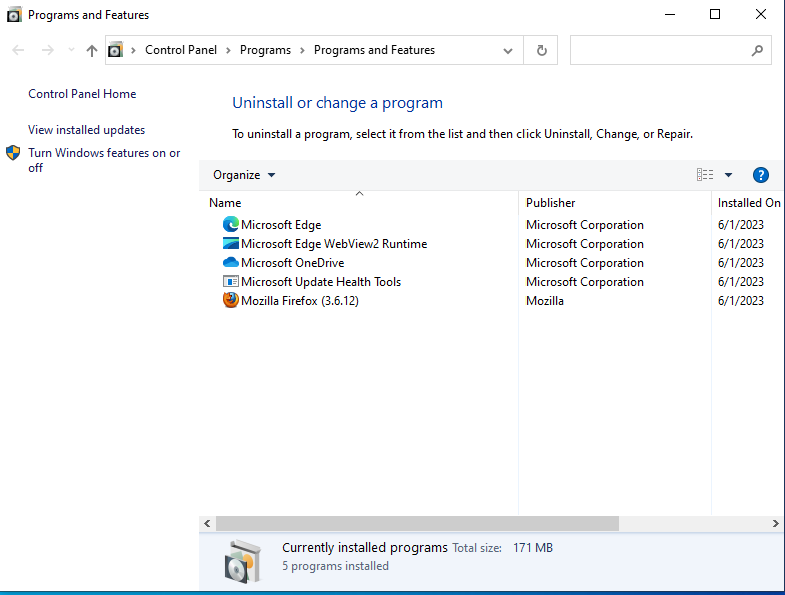
The remediations are surrounding browser updates for the most part which can be easily done by simply uninstalling Firefox and updating Microsoft Edge. Inside the VM, I went to appwiz.cpl and uninstalled Firefox.
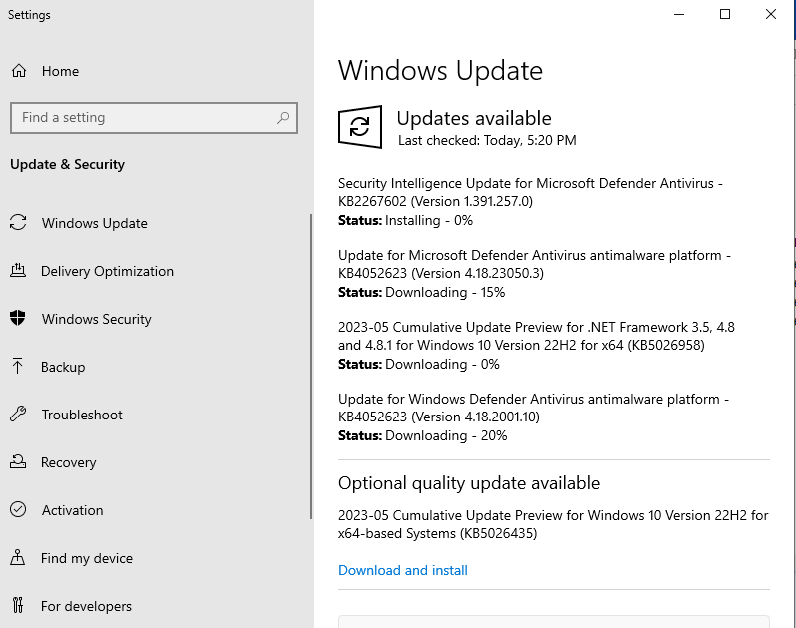
After that I checked for Windows updates and downloaded them. Once downloaded I restarted the VM.
Once that was done, I went back to Nessus to re-run a credentialed scan to see the results after remediating some of the vulnerabilities. These are the results of the new scan:
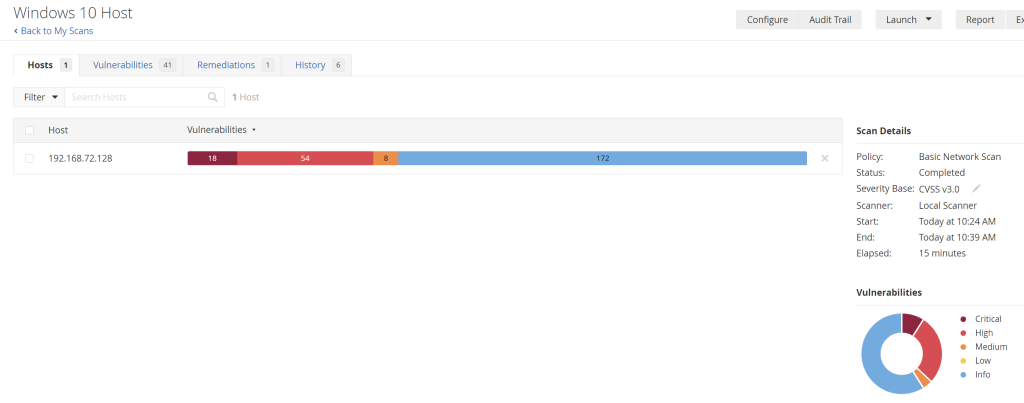
The results here show some of the recommended vulnerabilities have successfully been remediated.
This project shows a simple overview of the vulnerability management process, but in a large organization it goes much more into detail as there are standards and polices in place as well as hundreds of hosts to scan.