
A SIEM (Security Information and Event Management) is a powerful security tool used in organizations to collect historical and real-time data that can be used to detect threats on a network. It can be configured so that specific events and information can trigger alerts to the cybersecurity analysts so that they can review the data and respond to threats before they progress.
In this project I created a live virtual machine (VM) within Azure to act as a honeypot to expose it to RDP brute force attacks. I then setup Azure Sentinel (SIEM) and connected it to this virtual machine to log the attacks and provide the geolocation data of the attackers. Here is the step-by-step walkthrough of the setup:
The first step is to log in to portal.azure.com and click on “Create a resource”. Then click on “Virtual Machine”.

From here the VM can be created by filling out a few details. A subscription must be selected, followed by the creation of a new resource group. Then a name must be given to the VM along with the selection of the region and zone.
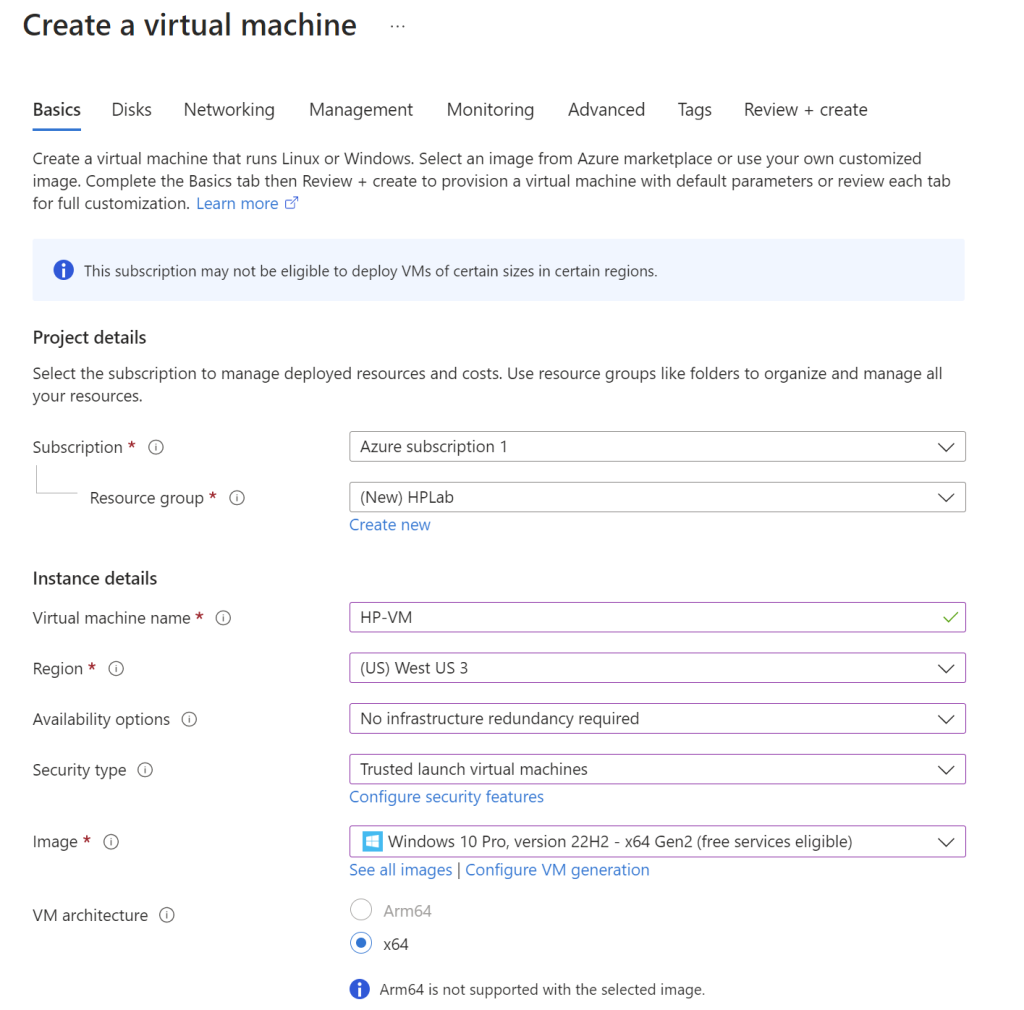
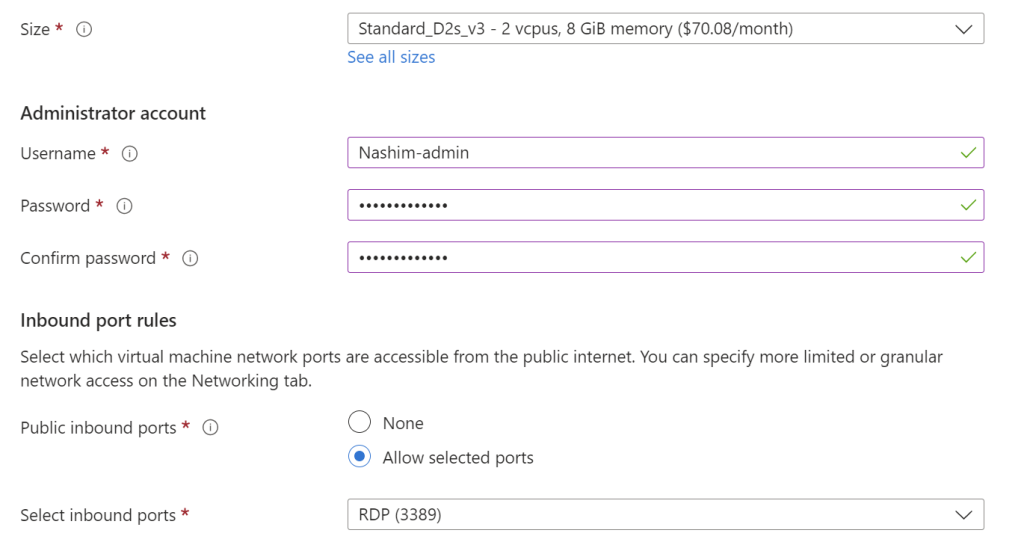
Then an administrator account must be created with a username and password. Below that we need to allow inbound traffic through port 3389 which is the Remote Desktop Protocol (RDP) so that the attacks can be executed.
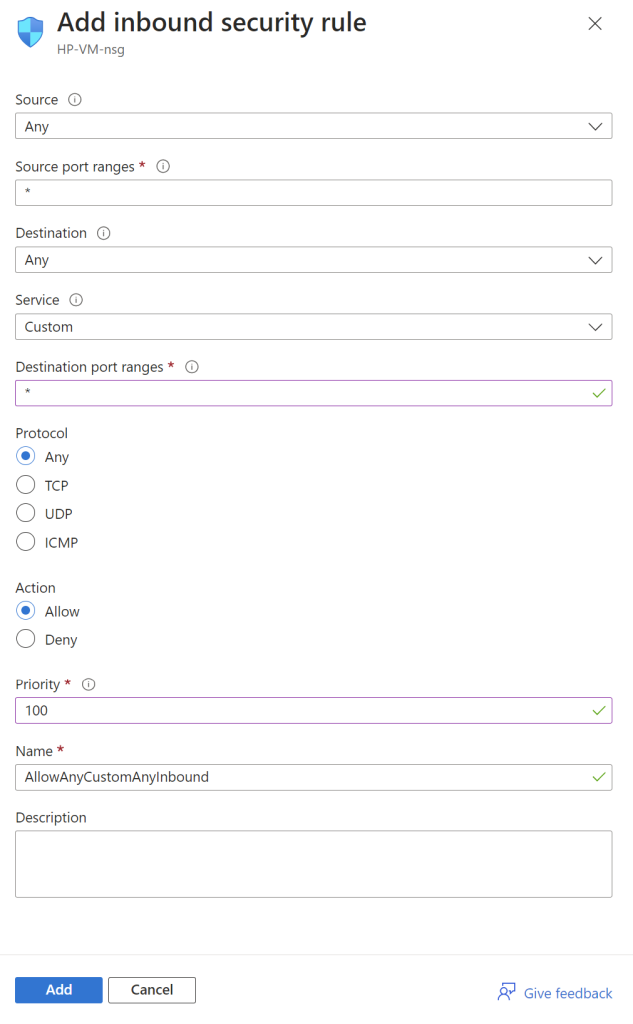
The next step is to click on the “Networking” tab and then click on “Create new” under Network Security Group. This will allow us to create inbound rules on the VM’s firewall. The default inbound rule needs to be deleted and we’ll need to create a new one. It will be configured so that essentially any inbound traffic is allowed. Now this is considered an unsafe practice but for the sake of the exercise we will configure it this way to allow the VM to be discoverable. Once that is done click on “Add” and then “Review + create”.
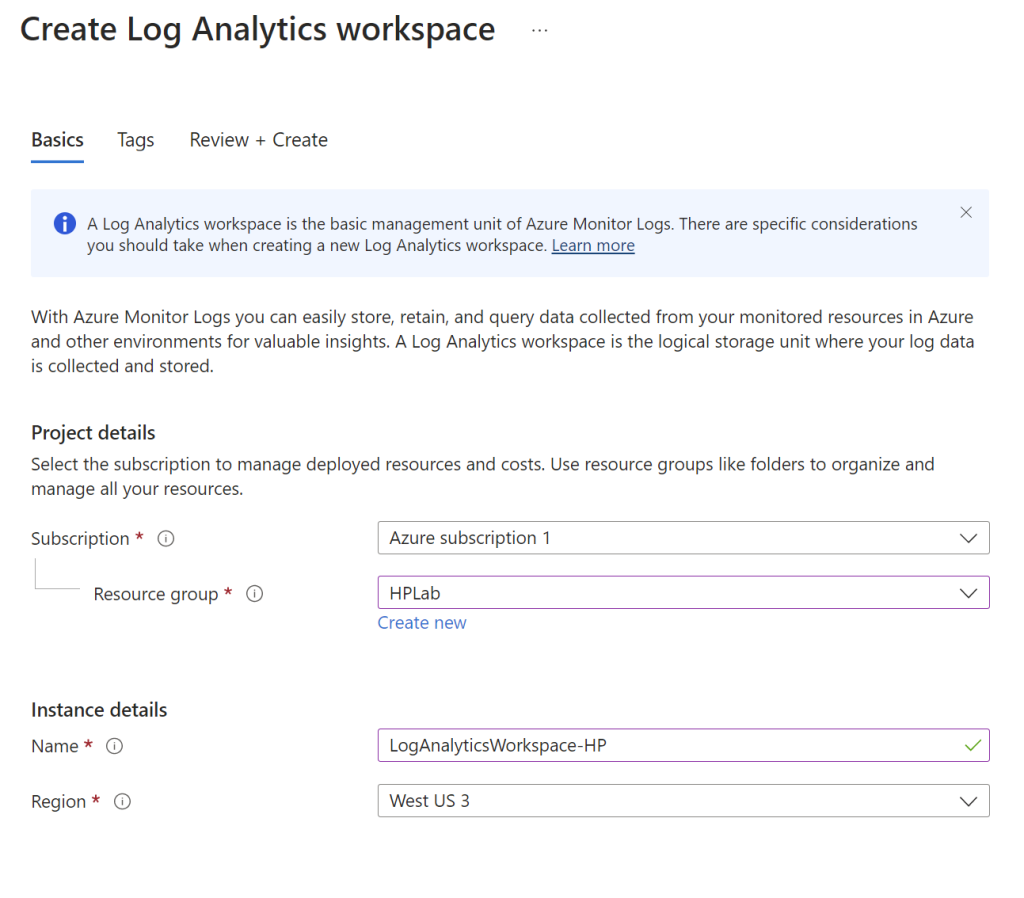
While the VM creation is loading, we will open up a new Azure portal tab and create a Log Analytics Workspace. This will be used to ingest custom logs once everything is up and running. After clicking on “Create Log Analytics Workspace”, a subscription and resource group must be created and the ones used for the VM can be selected here. A name can be given to it and the region must be the same as the one selected for the VM, then click “Create”.
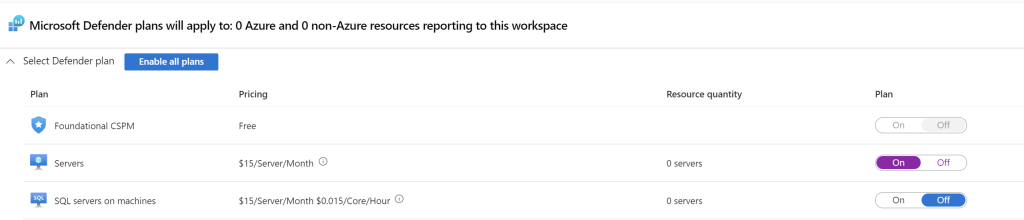
The next step is to configure some additional security settings by going to “Microsoft Defender for Cloud”, click on “Environment Settings”, and then click on the subscription that was created. Here make sure Foundational CSPM and Servers are on, and turn off SQL servers on machines as that server is not needed in this case.
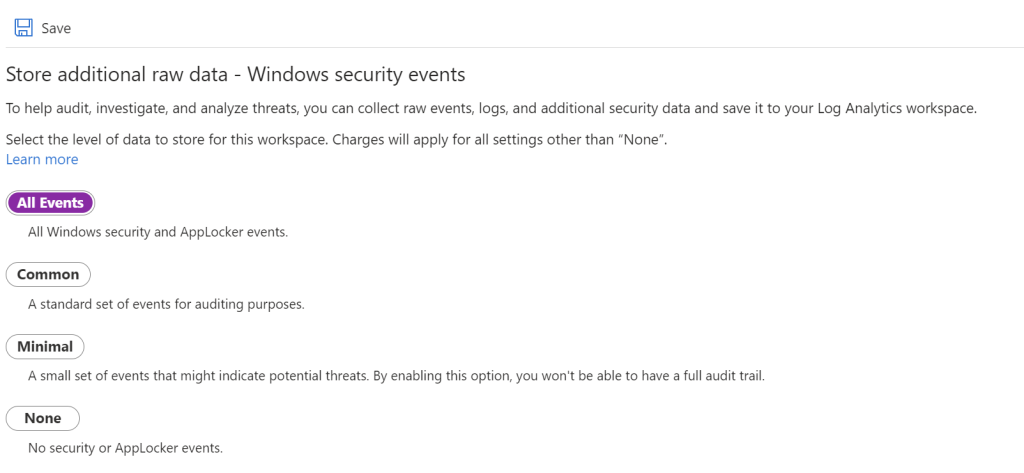
Then on the left toolbar click on “Data Collection” and select “All Events”. Since This exercise is being set up for one type of attack, this will allow everything to be stored in the logs. If it were set up in a real organizational environment then the other options would make more sense.
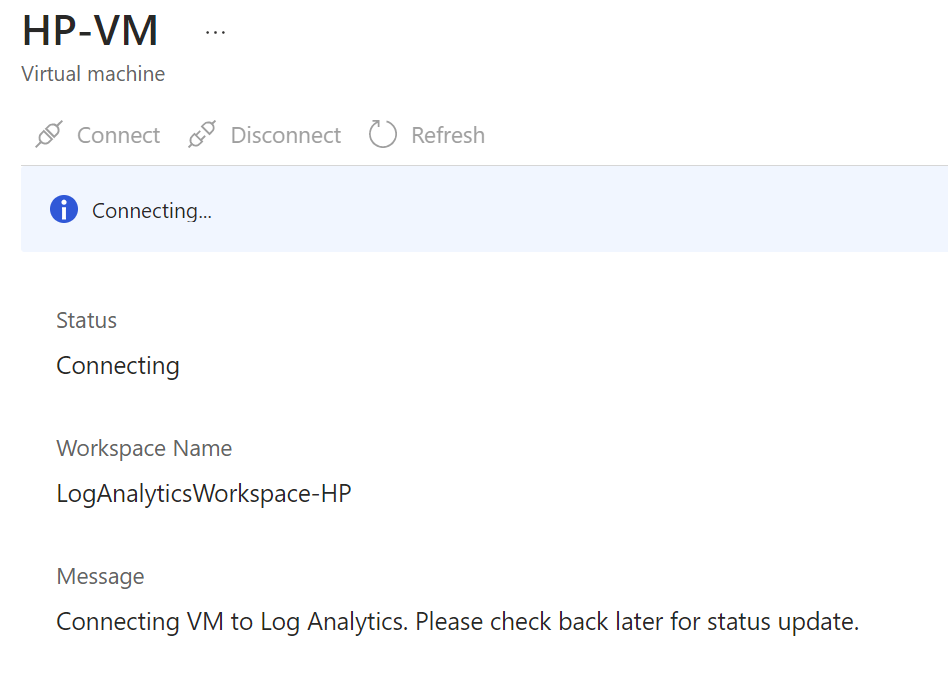
The next step will be to go back to the Log Analytics Workspace. Look for the “Virtual Machines” tab on the left toolbox, click on the VM that was created and the click “Connect” so that the VM can connect to the Log Analytics Workspace.
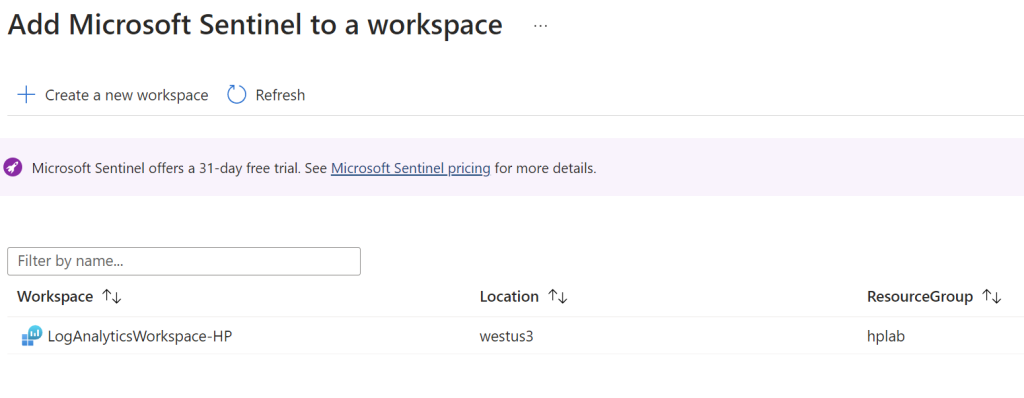
Now it’s time to create the SIEM. Type in Sentinel on the search box and click on “Create Azure Sentinel”. Under workspace click on the log analytics workspace that was created earlier to connect the SIEM to it.
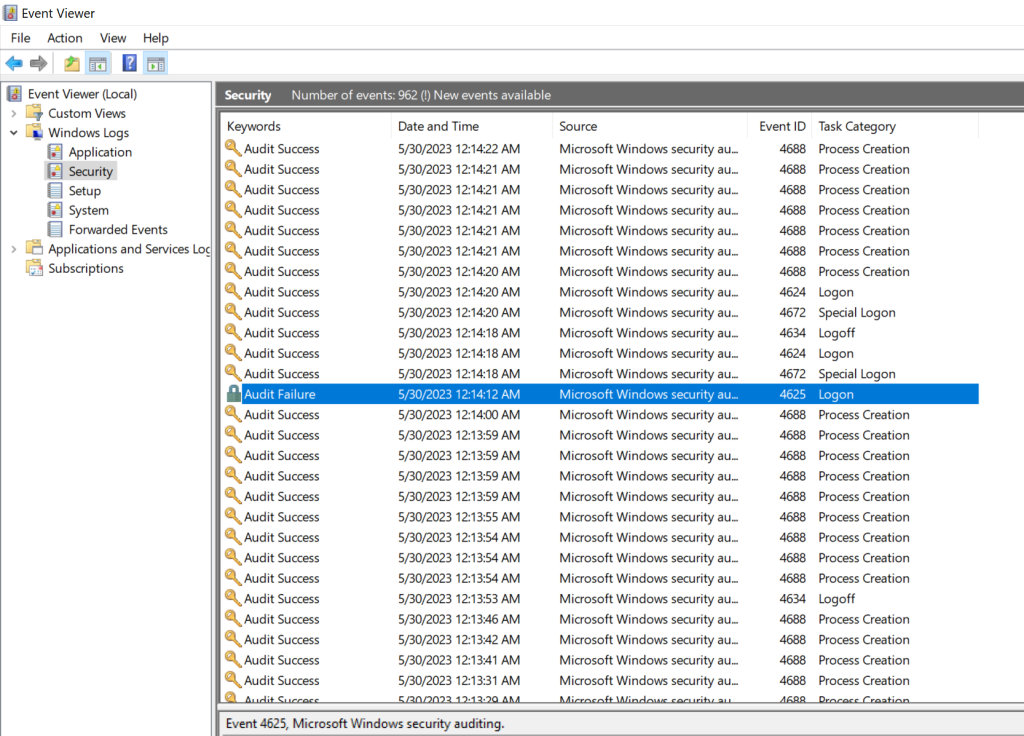
While that loads, the VM should be fully created now and can be remotely logged into. Open up the Remote Desktop Connection app and connect to the VM by typing in its IP address. Here the admin credentials that were created earlier will be used to log in. Once inside the VM, open up Event Manager. Under “Windows Logs” and then under “Security”, all of the security events on the VM will populate. Here we can identify failed RDP login attempts, as shown by the highlighted example.
From here the events can be opened to view specific details. The IP address can be obtained and plugged into and API. The IP address from this failed login attempt was plugged into the API https://ipgeolocation.io/ and the geolocation details such as the country, state, city, and latitude/longitude are displayed. This will be integrated with the SIEM later on to include this in the log data.

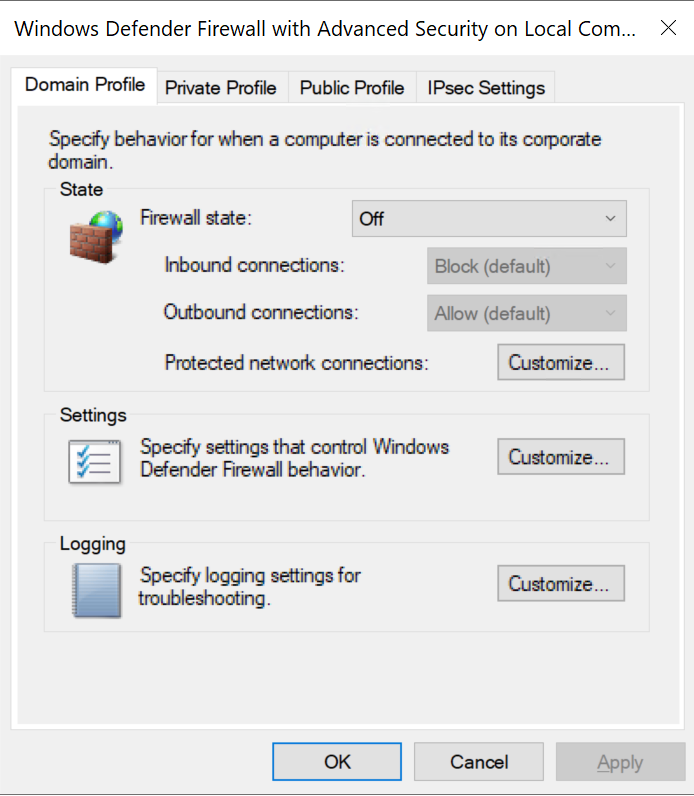
The next step is to open up the command prompt and ping the VM from the actual computer, and due to the VM’s default firewall settings, the ping should be unsuccessful. In order to fix this for the exercise, the VM’s firewall settings must be reconfigured. The domain, private, and public profile tabs should have the firewall state turned off. Hit “Apply” and then “Ok”. Now again this unsecure but is only being done to enable the exercise to work.
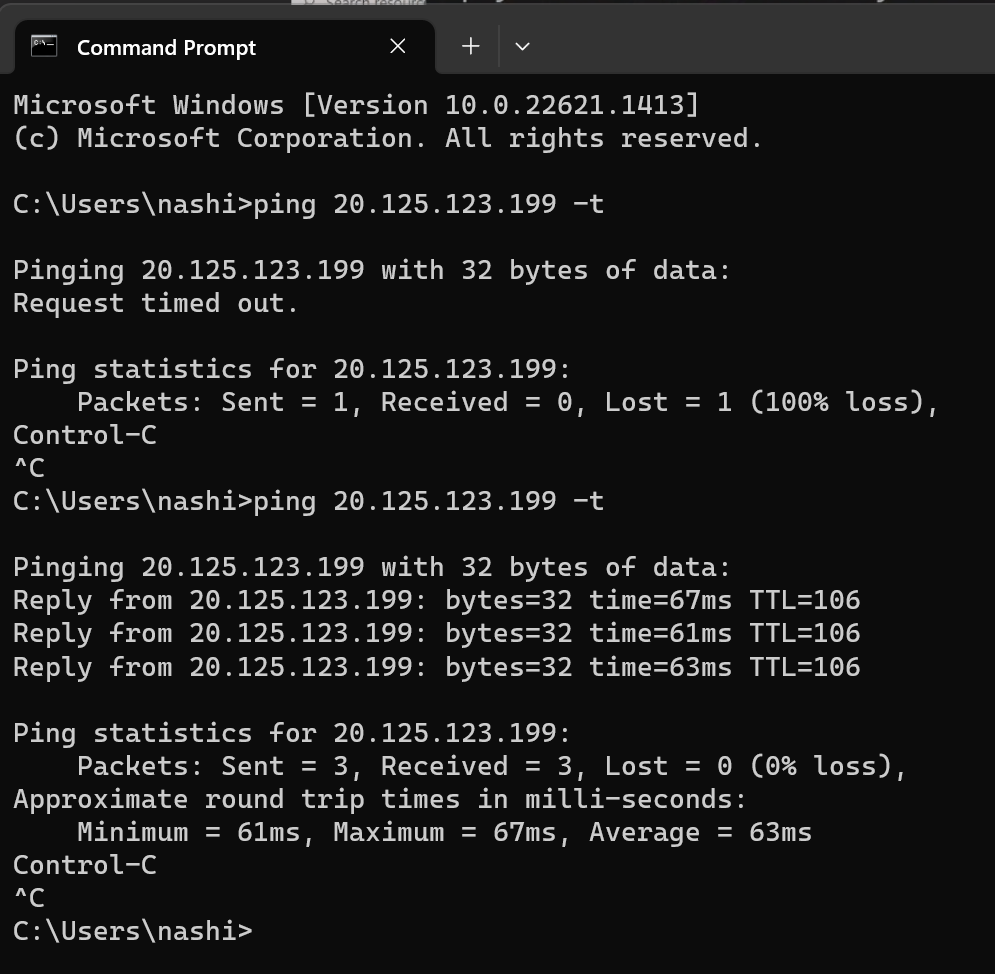
Now the ping command can be tried again from the actual computer. This is done by running the ping command with the VM’s IP address. Here it shows the ping was successful now that the VM’s firewall rules were changed.
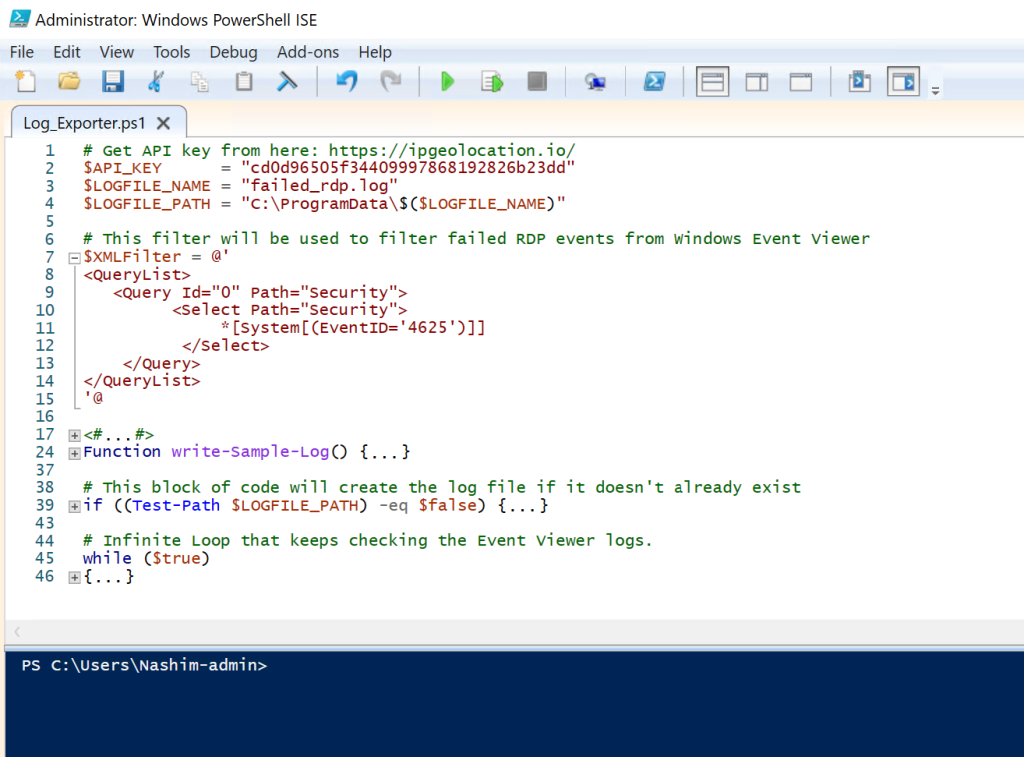
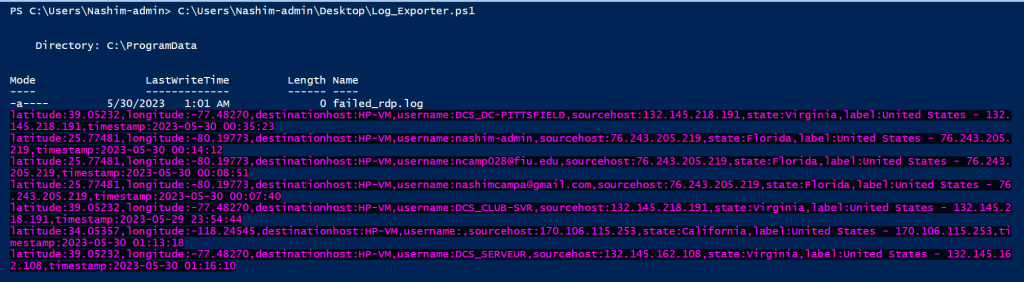
The next step from here is to download a custom PowerShell script from GitHub that will be used to automate the export of the security logs. In the VM, open up Windows PowerShell ISE and paste the code into a new script. Then the second line with the “API_Key” needs to be replaced with a custom API key which can be obtained by creating an account with the ipgeolocation website previously mentioned. Once this script is run, it will continuously check for failed login attempts (as shown in the last line) and will grab the IP address and geolocation data of the attacker.
When the script is run, you get the following data, which shows the failed login attempts so far:
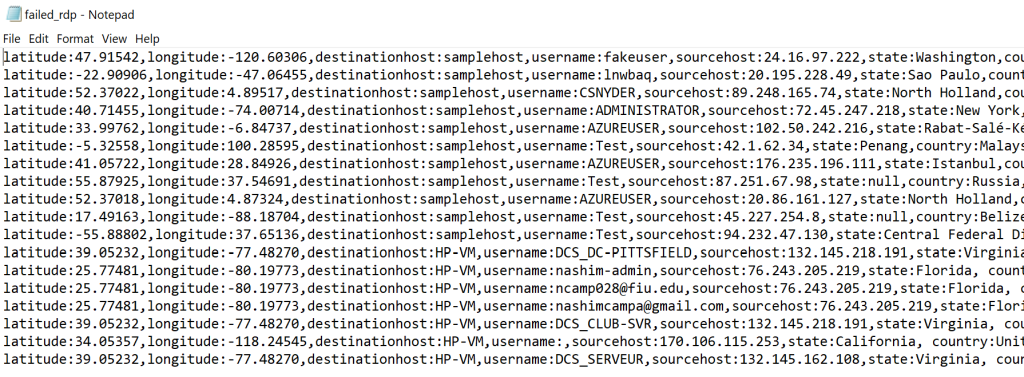
These logs will then be stored into a file on the VM, which will then be fed into the SIEM to create the log files within it. The logs below contain several samples that will be used to train the log analytics workspace.
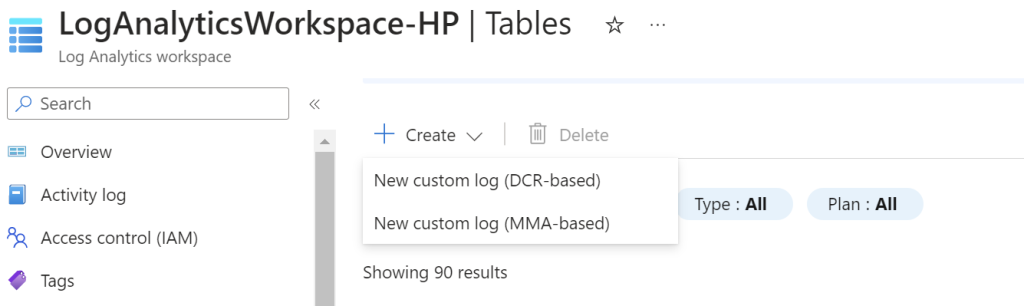
The next step will be to go back into the Azure portal. Under the Log Analytics Workspace, click on “Tables” on the left toolbar and under create, click on “New custom log (MMA-based)”.
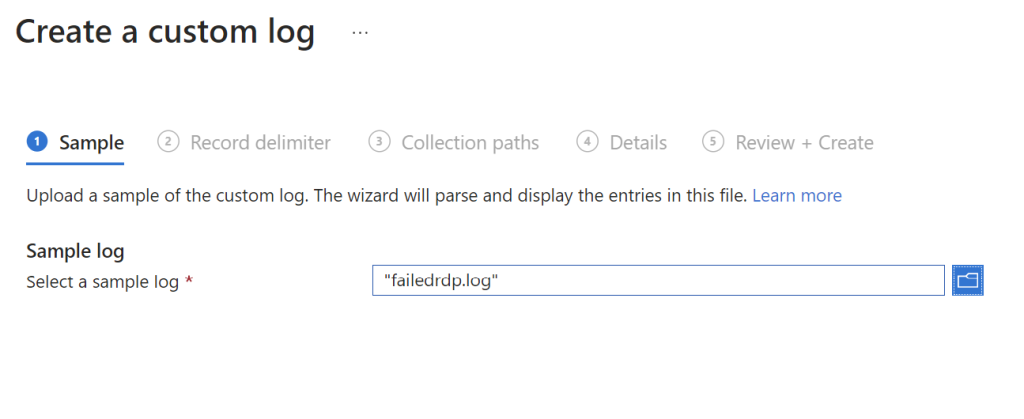
Then it will ask to create a custom log. The failed login attempts folder from the VM need to be transported to the actual computer and saved there. Then find it in the dropdown menu to import it into the logs analytics workspace.
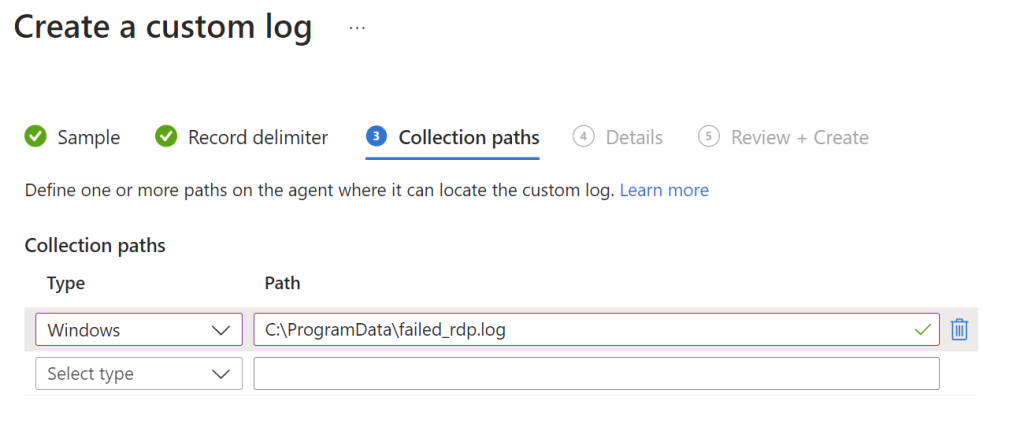
Next go to “Collection paths” and select the file location of the failed login attempts that is stored in the VM. Once that is done click on “Review + Create”.
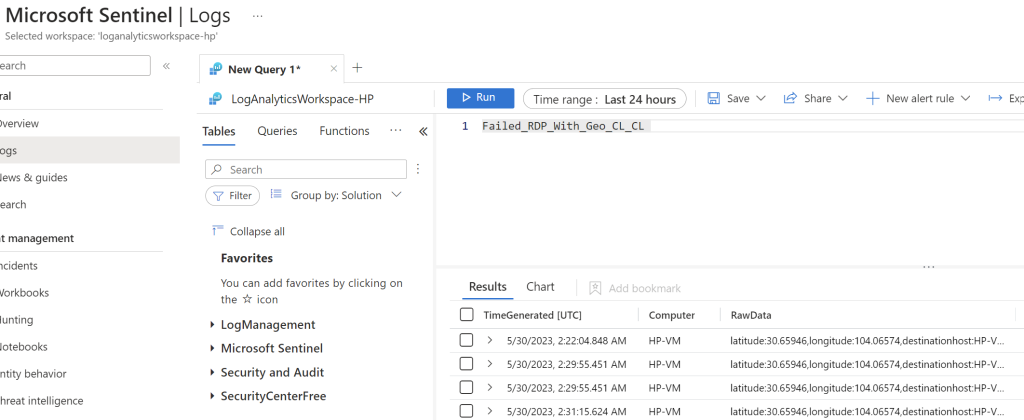
The next step is to go back to Azure Sentinel and click on “Logs” on the left toolbar. In the scripts section, type in the name of the newly created custom log. Once it is run, it will populate all of the logs from the last 24 hours below. From here, the raw data fields in the third column will need to be extracted. This can be done by right clicking the field and clicking “Extract”. This will allow specific criteria (such as the latitude, longitude, IP address, etc.) to have their respective columns in the logs.
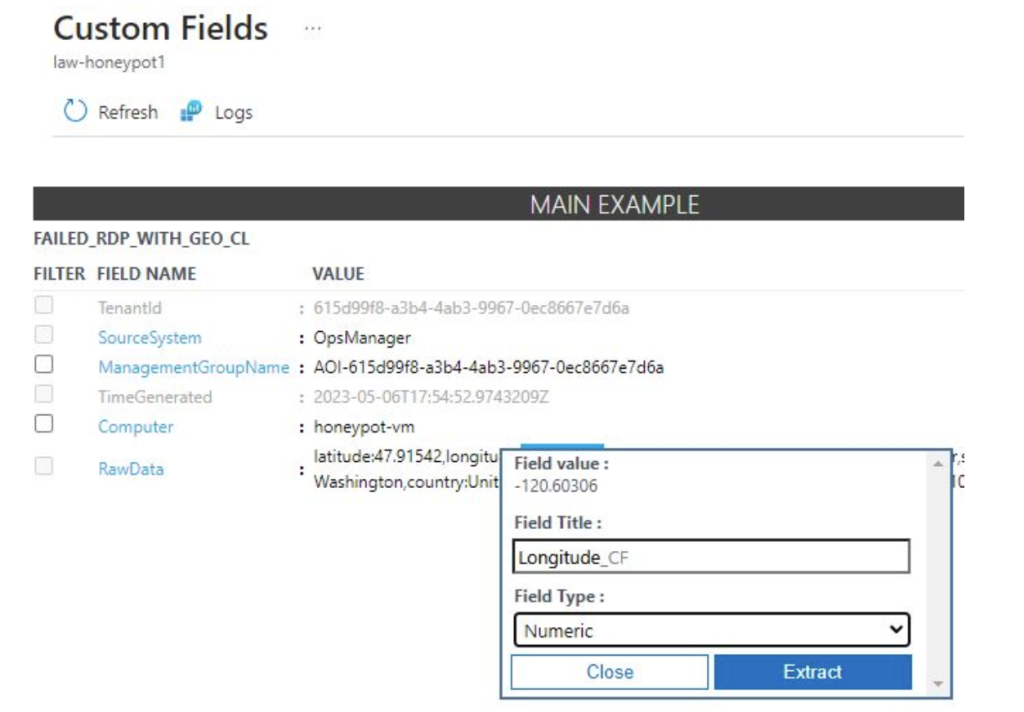
Once in the Custom Fields page, the first step is to highlight the latitude values and title it “Latitude” and set the field type to Numeric, then click “Extract”. This will populate search results on the right and all of the logs should have the latitude values highlighted.
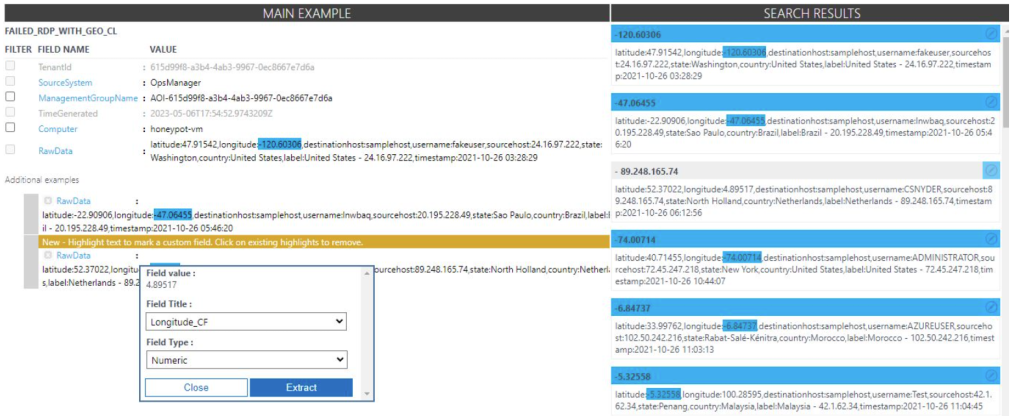
The same steps are taken but now with the longitude values. There are some logs that don’t highlight the correct values so they have to be individually fixed by extracting the correct value within the log by clicking “modify log”. This is the process of training the extract algorithm. Continue the same process for the rest of the raw data fields.
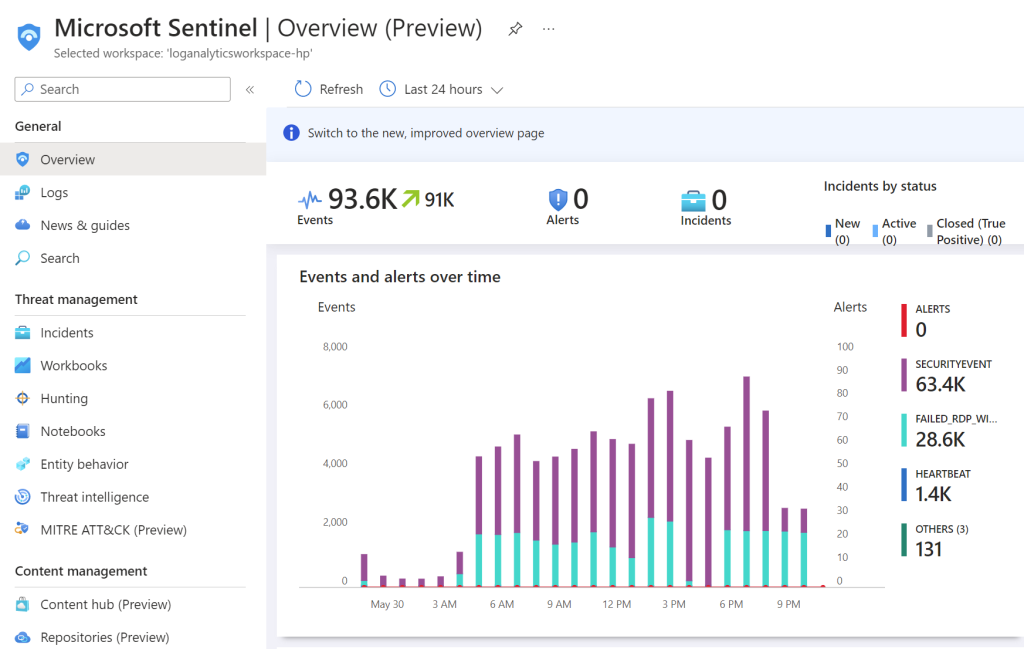
The final step is to set up a map with Azure Sentinel to graphically pinpoint the locations that the attacks are originating from. In Sentinel’s overview page you can get a bird’s eye view of the summary of events that have been logged so far.
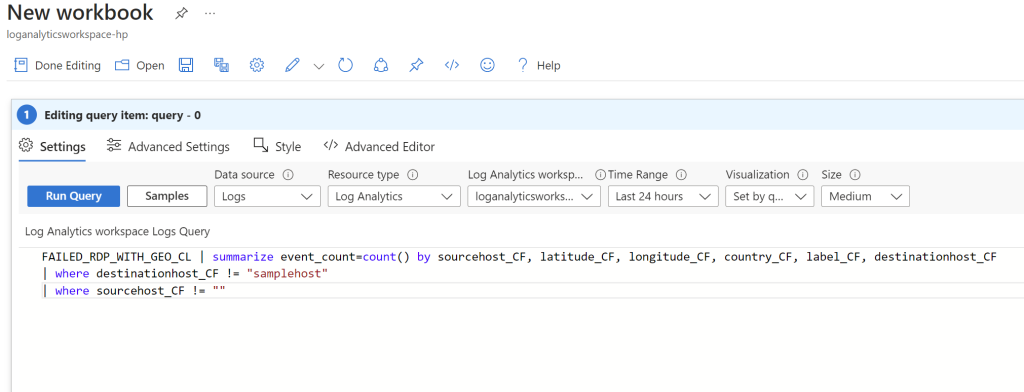
To create the map, click on “Workbooks” in the left toolbar and then click “Add workbook”. The click “Edit” and remove the two default widgets. From there click on “Add” and click “Add Query”. Here we will type in the following script:
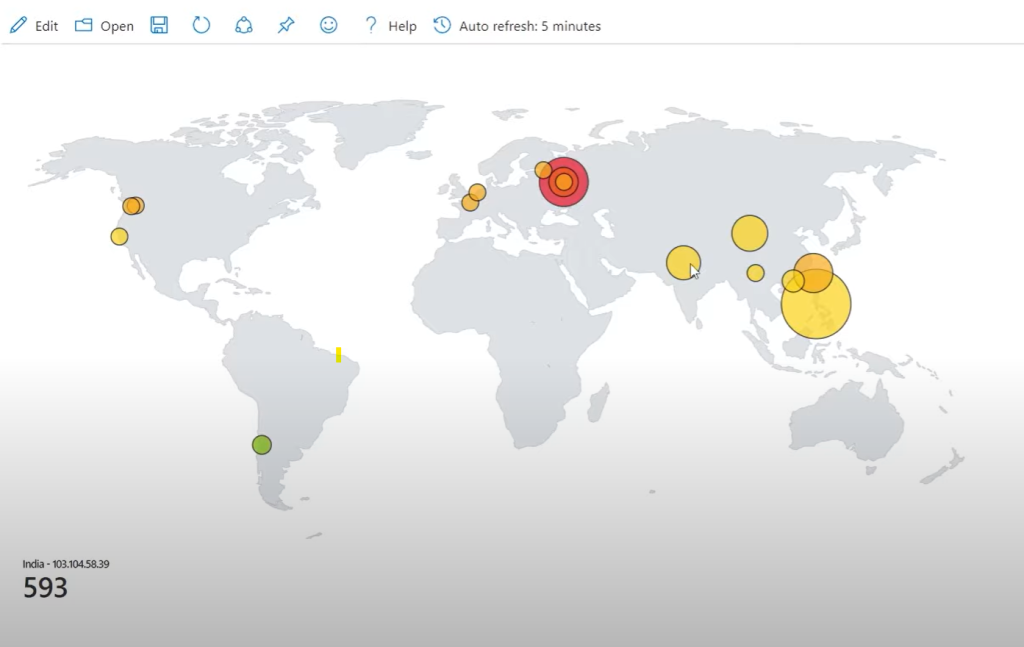
On the visualization tab click on “Map” and some map settings will populate to the right. Here the map display can be customized, I just selected the latitude and longitude fields in the layout settings. This is the final result that shows the geographical location of the failed login attempts:
This exercise is a great example of how quick and easy attacks are performed on the internet. Within minutes of creating the VM and configuring a few rules, attackers readily found my IP address and attempted logging in. This goes to show that nothing is safe on the internet no matter how insignificant it is. It is extremely important to secure devices properly to prevent these attacks. In the event that an attack is attempted, a SIEM is a powerful tool that can be used to detect it so that the appropriate action can be taken. In this case, if this environment was set up in an actual organization, the security analyst can review repeated login attempts and take certain actions like blocking the IP address or strengthen the password.